
Lighters are essential tools for starting fires, but what if you find yourself without one? Making your lighter can be an easy and cost-effective solution. In this article, we will guide you through the necessary steps of creating a homemade lighter and provide safety tips to ensure a secure process; also, smoke a cart with a lighter.
Key Takeaways
- Making a homemade lighter is simple and can save you money in the long run.
- It is important to understand the basic components of a lighter and gather all necessary materials before beginning the process.
- Safety measures should be at the forefront of your mind when handling flammable materials and testing the ignition of the lighter.
Understanding the Components of a Lighter
Making a DIY lighter requires first understanding the basic components of a standard lighter. Lighters typically have a fuel chamber, a flint wheel, and a safety mechanism. The fuel chamber holds the flammable fluid, while the flint wheel ignites the fluid with sparks produced by the friction of the flint and steel. The safety mechanism prevents accidental ignition by locking the flint wheel when not in use.
While there are various types of lighters, including butane and electric, this article focuses on creating improvised fire starters using commonly available household objects. These homemade lighters may not have the same level of safety and reliability as manufactured lighters; therefore, it’s important to use them cautiously and adhere to all safety tips.
Types of Lighters You Can Make at Home
Several types of lighters can be crafted using simple materials. Some popular choices include:
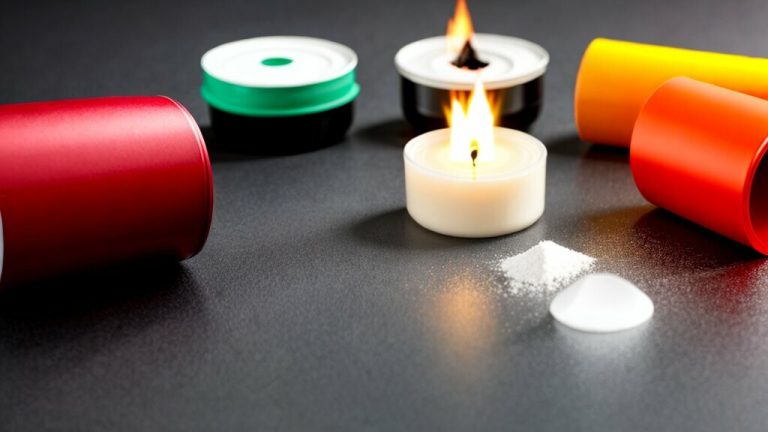
- Container lighters: made using metal or plastic containers, such as an empty Altoids tin or a used peanut butter jar.
- Wick lighters: made using a cotton wick and a flammable fluid, such as rubbing alcohol or lamp oil.
- Fire pistons: made using a hollow tube and piston to compress air and produce heat.
While these improvised lighters may not have the same level of convenience as store-bought lighters or matches, they can serve as a useful backup option in emergencies or when outdoors.
Using Lighters Safely
It’s important to exercise caution when using any lighter, but especially when using improvised fire starters. Follow these safety tips when using homemade lighters:
- Never leave a lighter unattended while in use.
- Store flammable materials out of reach of children and pets.
- Do not use near flammable materials or in enclosed spaces with poor ventilation.
- Avoid exposing the lighter to excessive heat or prolonged sunlight.
- Dispose of the lighter properly and safely when no longer needed.
Following these safety tips can minimize the risk of accidents or injuries when using homemade lighters. It’s also important to test the lighter in a safe environment before relying on it in an emergency.
Gathering the Necessary Materials
Before you begin making your homemade lighter, you will need to gather all the necessary materials. Below is a list of the items you will need:
| Materials | Alternative Materials |
|---|---|
| A metal container (such as an Altoids tin or a small metal can) | An empty pill bottle or a small glass jar |
| Cotton wick | A shoelace or a strip of cotton cloth |
| A flammable fluid (such as lighter fluid or rubbing alcohol) | Hand sanitizer or vegetable oil |
It is important to use caution and handle flammable materials carefully. Make sure to also work in a well-ventilated area and avoid open flames.
Preparing the Container
Before assembling the lighter, it is important to prepare the container. Choose a metal container that is clean and dry. Ensure the container has a tight-fitting lid to prevent the fuel from evaporating.
Depending on your preference, you can use a metal candy tin, an Altoids tin, or any other small metal container. It is important to choose a container that is easy to hold and fits comfortably in your pocket.
Thoroughly clean the container with soap and water, then dry it completely. Any leftover moisture can affect the lighter’s ignition, so ensure it is completely dry before proceeding.
Assembling the Wick and Fluid
Now that you have gathered all the necessary materials, it’s time to assemble the wick and fluid. The wick is an essential component of the lighter, and it needs to be made from a highly flammable material that can hold the fuel. Cotton is an excellent material for making easy wicks to ignite and burn efficiently.
Start by cutting a piece of cotton string to the desired length. Ensure that the length is slightly longer than the height of the container so that the wick can be easily lit. Next, soak the cotton wick in a flammable fluid such as rubbing alcohol, lighter fluid, or lamp oil. Allow the wick to absorb the fluid completely so it burns efficiently.
It’s important to handle the flammable fluid with care. Always work in a well-ventilated area, away from any flame or heat source. Also, ensure the fluid container is tightly sealed when not in use and store it in a cool, dry place.
Assembling the Wick and Fluid
Before inserting the wick into the container, it must be assembled and saturated with flammable fluid. Begin by cutting a length of cotton string slightly longer than the container you selected for your homemade lighter. The wick should be thick enough to fit snugly in the fuel chamber while allowing room for airflow.
Once you have the appropriate length of cotton string, remove any loose fibers and twist the ends to form a pointed tip. The twisted tip will help make inserting the wick into the fuel chamber easier.
Next, saturate the cotton wick with flammable fluid. This can be done by dipping the wick into the fluid or using a dropper to apply the fluid evenly along the length of the wick. Be sure to choose a flammable fluid appropriate for your selected container and ignition mechanism.
After saturating the wick, allow it to dry for at least 15 minutes before inserting it into the container. This will ensure that the fluid has been evenly absorbed and that excess fluid has been allowed to drip off.
Caution: When handling flammable fluids, work in a well-ventilated area and avoid contact with open flames or spark-producing materials.
Testing the Ignition
After assembling the homemade lighter, it’s important to test the ignition mechanism to ensure it works properly. Hold the container securely and flick the flint wheel with your thumb or finger while maintaining a firm grip on the container.
Congratulations, your homemade lighter is working if the wick ignites and produces a flame! However, if there is no ignition or the flame is weak, try trimming the wick’s length slightly. You can also try saturating the wick with more flammable fluid or adjusting the position of the wick inside the container.
It’s important to remember that making a homemade lighter carries certain risks, and precautions should always be taken. Always keep the lighter away from heat sources and flammable materials, and never leave it unattended while in use. If the flame becomes too large or starts to flicker dangerously, extinguish it immediately by covering the container with a lid or other non-flammable material.
Safety Tips for Using Homemade Lighters
Making a homemade lighter can be a fun and rewarding DIY project, but it is important to prioritize safety at all times. Follow these tips to ensure that you stay safe while using your homemade lighter:
- Handle flammable materials carefully: Use caution when handling flammable fluids, and keep them away from heat sources and open flames.
- Avoid excessive heat: Avoid exposing your homemade lighter to heat, such as leaving it in a hot car or placing it near a fire pit.
- Store your lighter properly: Store your homemade lighter in a cool, dry place away from children and pets.
- Always use in a well-ventilated area: When using your homemade lighter, ensure that you are in a well-ventilated area to avoid inhaling fumes or smoke.
- Never modify your lighter: Do not attempt to modify your homemade lighter’s ignition mechanism or other components. Doing so could increase the risk of accidents or injury.
- Keep a fire extinguisher nearby: In case of an accident, always keep a fire extinguisher or other fire suppression tools nearby.
By following these safety tips, you can enjoy using your homemade lighter with peace of mind. Remember, safety should always come first, no matter how simple a DIY project may seem.
Alternative Methods for Homemade Lighters
Aside from the basic homemade lighter, there are a few alternative methods for creating a fire starter from household items that you may find useful. These methods can be useful in emergencies or when starting a fire without traditional equipment. Here are some DIY lighter ideas:
1. Battery and Gum Wrapper
You can create a simple makeshift lighter if you have an AA battery and a gum wrapper (preferably one made of foil). Fold the wrapper in half, then fold it over the negative end of the battery, holding it in place with your thumb. Hold the positive end of the battery against the foil, and the wrapper should start to smoke. Hold it over dry kindling until it catches fire.
2. Magnifying Glass and Tinder
Using the sun’s rays and a magnifying glass, you can create a small flame with a dry tinder. Hold the magnifying glass over the tinder, angling it toward the sun. The concentrated rays will ignite the dry material and create a flame. Be sure to choose a sunny day and a spot sheltered from the wind.
While these methods may not be as convenient as a traditional lighter, they can be handy in a pinch. Use them only in emergencies; always take proper precautions to avoid injury.
Additional Creative Uses for Homemade Lighters
Homemade lighters don’t just have to be used for starting fires. With a little creativity, you can repurpose them in various ways. Here are a few ideas to get you started:
- DIY Candles: Use your homemade lighter’s fuel to create eco-friendly candles. Melt down some wax, add a few drops of essential oils for fragrance, and add your homemade wick. Pour the mixture into your lighter container and allow it to cool.
- Miniature Terrarium: You can create a miniature terrarium if your lighter container is transparent or translucent. Add some small rocks and soil to the container, and plant a succulent or small plant. Just make sure to leave enough room for the wick and fuel.
- Oil Lamp: Fill your lighter container with oil and add a long wick. Light the wick and you have a mini oil lamp for camping trips or emergencies.
- Emergency Sewing Kit: Use the container as a small storage unit for needles, thread, and small buttons. The wick can be used as a makeshift thread in a pinch.
These are just a few examples of using your homemade lighter container. Get creative and see what other uses you can come up with!
Maintenance and Care for Homemade Lighters
Once you’ve made your lighter, it’s important to take care of it properly to keep it working effectively and safely. Here are some maintenance tips:
Clean the Flint Wheel
The flint wheel is an essential component of your homemade lighter. Over time, it can become coated with debris and buildup that can prevent it from igniting properly. To clean the flint wheel, use a small brush or toothbrush to scrub away any particles or residue gently.
Replace the Wick
The cotton wick in your homemade lighter will eventually wear out and must be replaced. When you notice the flame getting smaller or the wick becoming discolored or frayed, it’s time for a replacement. Simply remove the old wick and insert a new one in its place.
Avoid Overfilling the Fuel Chamber
It’s important not to overfill the fuel chamber of your homemade lighter. Too much fluid can cause leaks and potential fire hazards. Follow the instructions carefully for the type of lighter you have made and always use caution when handling flammable fluids.
Store Your Homemade Lighter Properly
Store your homemade lighter in a cool, dry place away from direct sunlight or heat sources when not in use. This will help prevent the flammable fluid’s evaporation and ensure that the ignition mechanism stays in good condition.
Conclusion
Creating your lighter can be a fun and cost-effective DIY project. Following the simple steps outlined in this article, you can make a homemade lighter using materials readily available in your home. As with any project involving flammable materials, it is important to practice safety measures to avoid accidents.
Takeaways
Remember these key points:
- Understand the basic components of a lighter and choose an appropriate container
- Be mindful of safety tips when handling flammable materials
- Test the ignition mechanism and troubleshoot as necessary
- Explore alternative methods for making homemade lighters and repurpose the container for other projects
- Maintain and care for your homemade lighter to extend its lifespan
By following these guidelines, you can create your own functional and practical lighter. Use it to light a candle, start a campfire, or as a unique addition to your crafting projects. Have fun and be safe!

I’m Alfred Davis, and I’m all about lighters. Hailing from the great state of Texas, USA, I’ve cultivated a deep passion for these fascinating gadgets. With years of hands-on experience and a burning curiosity (pun intended), I’ve become an expert in all things related to lighters.
My journey with lighters began as a hobby and quickly became a full-blown obsession. I’ve explored the diverse world of lighters inside and out, from classic Zippo designs to modern plasma arc models. I’ve tested, tinkered with, and even collected rare pieces while learning the intricate mechanics and unique histories behind each one.
Through my writing, I aim to share my knowledge, insights, and reviews to help you make informed decisions about choosing the perfect lighter. Whether you’re a seasoned collector or just looking for a reliable fire source, I’ve got you covered. Join me in unraveling the fascinating realm of lighters right here at LightersInfo, where ignition meets expertise.
Alfred Davis