
Clipper lighters are well-liked by smokers as they are refillable and can be customized with different designs. Refilling your Clipper or torch lighter is cost-effective and environmentally friendly instead of buying a new one every time. However, following a step-by-step guide and taking safety measures to avoid potential accidents or damage to your lighter is essential.
Key Takeaways
- Refilling Clipper lighters is more cost-effective and eco-friendly than buying a new one.
- Following a step-by-step guide and taking safety precautions are essential to avoid accidents or damage to the lighter.
Why Refill Your Clipper Lighter?
Refilling a Clipper lighter is not only cost-effective but also positively impacts the environment. Instead of buying a new lighter every time the fuel runs out, refilling allows you to reuse the exact more delicate multiple times.
Refilling a Clipper lighter with different fuels such as butane, propane, or clean burning fuel can give users more customization options. These fuels offer various benefits, such as better performance, increased longevity, and cleaner burning.
By refilling your Clipper lighter, you can save money, reduce waste, and enjoy a more personalized and efficient experience.
What You’ll Need to Refill a Clipper Lighter
If you want to refill your Clipper lighter, you’ll need a few essential supplies. Make sure you have the following items before you begin:
| Supplies | Description |
|---|---|
| Butane Fuel | A canister of high-quality butane fuel with an extended nozzle tip is recommended for easy and efficient refill. |
| Small Screwdriver | A small Phillips head screwdriver or similar tool to detach the metal casing. |
| Pliers (optional) | Pliers may be helpful if the metal casing is challenging to remove. |
You can easily find these supplies at your local hardware or smoke shop. Be sure to choose high-quality fuel to get the best performance from your Clipper lighter.
Precautions and Safety Measures
Before attempting to refill your Clipper lighter, taking necessary safety measures to avoid accidents or injuries is essential. Follow these precautions to ensure a safe and successful refill:
- Keep the lighter away from any open flames or other heat sources.
- Make sure the lighter is completely cool before beginning the refill process.
- Use only recommended fuels, such as butane, and avoid using other flammable liquids or gases.
- Ensure proper ventilation in your working area to avoid inhaling fumes.
- Hold the lighter and fuel canister away from your face and body while refilling.
- Avoid overfilling the lighter, which can cause gas leaks and result in a fire hazard.
- Always use a small screwdriver or pliers to remove the metal casing and carefully handle the refill process.
Following these precautions, you can safely refill your Clipper lighter and avoid accidents or injuries.
Step-by-Step Guide to Refill Clipper Lighter
Refilling a Clipper lighter is easy, but it requires following the proper steps to ensure a safe and successful refill. Here’s a step-by-step guide to follow:
- Remove the metal casing from the lighter. Use a small screwdriver to pry the metal casing off the more delicate.
- Remove the inner sleeve. Use a pair of pliers to grip the inner sleeve and pull it straight out.
- Insert the nozzle fuel canister into the valve at the bottom of the lighter. Make sure the nozzle fits snugly into the valve.
- Press down on the butane fuel canister, allowing the fuel to flow into the lighter. Hold the lighter and canister upright while refilling.
- Monitor the level of fuel in the lighter. Stop filling when the power reaches the top of the valve.
- Wait a few minutes before reassembling the lighter. This allows the fuel to settle and ensures optimal performance.
- Replace the inner sleeve and metal casing. Ensure the inner sleeve is aligned correctly before pushing it back into place. Snap the metal casing back onto the lighter.
- Test the lighter. Hold the lighter away from your face and ignite the flame. Adjust the flame height if necessary.
Congratulations, you have successfully refilled your Clipper lighter. Always follow safety precautions and maintain your lighter regularly for optimal performance.
Tips for Easy and Quick Clipper Lighter Refill
Refilling a Clipper lighter can be a straightforward process with the right approach. Here are some tips to make it even easier:
- Use quality butane fuel: Investing in good quality butane can save you time and hassle in the long run, as it is less likely to cause clogs or malfunctions.
- Please keep your hands steady: When refilling your lighter, it’s essential to keep your hands steady to avoid spilling fuel or damaging the lighter’s components. Use a flat surface if necessary, and take your time.
- Align the parts correctly: After refilling the Clipper lighter, align the metal casing and other components correctly before reassembling it. This will ensure smooth operation and prevent damage to the lighter.
- Avoid overfilling: Do not overfill the lighter with fuel, as it can cause gas leaks or damage to the components. Fill it in just enough to avoid any issues.
- Let the lighter sit for a few minutes: After refilling, the lighter, let it rest for a few minutes to allow the fuel to settle and stabilize. Then, test it to see if the flame is consistent and if the lighter functions correctly.
Note: Always follow safety precautions when refilling your Clipper lighter. Keep away from open flames and ensure proper ventilation.
Refilling a Clipper Lighter Without Butane
If you don’t have butane fuel or prefer not to use it, alternative methods exist to refill your Clipper lighter. While these options may not be as efficient as butane, they can still do the job.
Using Lighter Fluid
One alternative to butane fuel is lighter fluid, commonly used in traditional lighters. To refill your Clipper lighter with lighter fluid, follow these steps:
| Steps | Action |
|---|---|
| Step 1 | Remove the metal casing from your Clipper lighter. |
| Step 2 | Use a small screwdriver to remove the cotton filling from the lighter. |
| Step 3 | Fill the lighter with lighter fluid using a small dropper. |
| Step 4 | Replace the cotton filling and reassemble the lighter. |
It’s important to note that lighter fluid may have a noticeable odor and may not be as efficient as butane fuel. Use caution when handling lighter fluid and keep away from open flames.
Transferring Fuel from Other Lighters
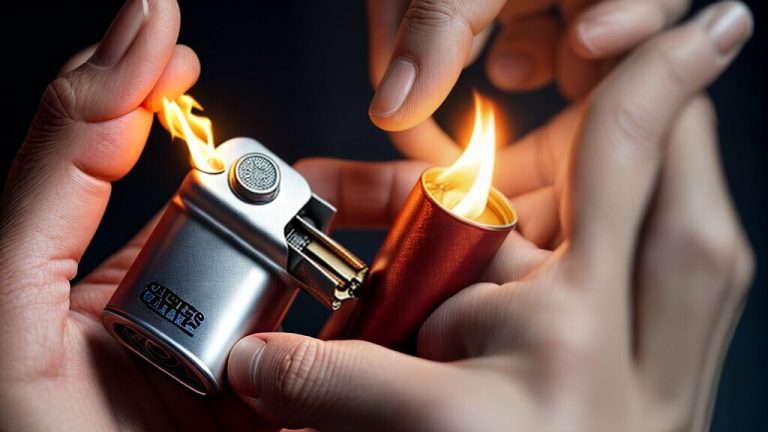
Another option is to transfer fuel from a disposable lighter or another Clipper lighter. This method can be done easily and efficiently but may not fully refill your lighter.
To transfer fuel from another lighter, follow these steps:
- Hold the two lighters securely with the nozzles pointing toward each other.
- Press the refill nozzle of the full lighter into the refill valve of the empty lighter.
- Gently squeeze the full lighter to transfer fuel into the empty lighter.
- Repeat until the desired fuel level is reached.
While this method may be convenient, it’s essential to use caution and avoid overfilling your Clipper lighter.
Best Method to Refill Clipper Lighter
When refilling a Clipper lighter, you can use a few different methods depending on your preferences and experience. However, the optimal way to fill a Clipper lighter is by using butane fuel. Butane is a clean-burning fuel that offers high efficiency and performance, making it the most popular choice among Clipper lighter users.
When selecting a butane fuel, choosing a high-quality brand free of impurities is essential. This will help ensure a smooth and steady flame and reduce the risk of clogs or malfunctions. Butane fuel is found at most tobacco shops, convenience stores, or online retailers.
Following the step-by-step guide when refilling your Clipper lighter is essential to ensure proper safety and performance. Remember that overfilling your lighter can result in gas leaks and other dangerous situations, so it’s necessary to use caution and avoid rushing the process.
By following these tips and using butane fuel, you can enjoy a smooth and consistent flame that will get your Clipper lighter working like new again. With proper maintenance and care, your refilled Clipper lighter can provide years of reliable use.
Maintaining Your Refilled Clipper Lighter
Maintaining your refilled Clipper lighter is crucial to ensure its longevity and optimal performance. Here are some tips to keep your lighter in top condition:
- Clean the lighter regularly: Over time, dust, debris, and residual fuel can accumulate inside your lighter, affecting its performance. Clean it regularly with cotton. Ensure not to use water or other liquids that may damage the lighter.
- Replace flints: If your lighter’s sparks become weak or inconsistent, it could be a sign that the flint needs replacement. Clipper lighters have replaceable flints that can be easily found in stores or online. Follow the manufacturer’s instructions to replace the flint.
- Store it safely: Keep your lighter dry and cool when you are not using it. Avoid exposing it to direct sunlight or heat, as it can cause the fuel to evaporate or the plastic casing to melt. Keep it away from children and pets to prevent accidents.
Troubleshooting Common Issues
While refilling a Clipper lighter is generally a straightforward process, there are several common issues that you may encounter. Here are some troubleshooting tips:
Gas leaks
If you notice gas leaking from your refilled Clipper lighter, try adjusting the flame adjustment wheel to release excess gas. Make sure that the lighter is fully assembled and tightened. If the leak persists, you may need to replace the fuel valve or O-ring.
Weak flames
If your Clipper lighter produces weak flames after refilling, it may be due to air bubbles in the fuel tank. Try shaking the lighter gently to release any trapped air. You can also adjust the flame height to see if it improves the performance of the more delicate ones.
Ignition issues
If your Clipper lighter fails to ignite after refilling, check that the flint is in good condition and properly installed. You may need to replace the flint or adjust the flint screw to make it strike against the wheel properly. You can also try changing the flame height to see if it helps spark the lighter.
Always follow safety measures and use caution when troubleshooting your Clipper lighter. If you are unsure how to resolve an issue you encounter, you may be seeking the assistance of a professional.
Conclusion
Refilling your Clipper lighter can be an economical, frugal, and environmentally friendly alternative to buying a new one. Following our step-by-step guide and taking the necessary precautions, you can safely and successfully refill your Clipper lighter with butane or other fuels. Remember to maintain your refilled lighter regularly by cleaning, replacing flints, and storing it safely.
Final Thoughts
Clipper lighters are known for their quality and durability; refilling them is a great way to extend their lifespan. Whether you prefer using butane fuel or exploring alternative options, the key is to ensure that you follow the correct process and take necessary safety precautions. By doing so, you can enjoy your refilled Clipper lighter for many years.

I’m Alfred Davis, and I’m all about lighters. Hailing from the great state of Texas, USA, I’ve cultivated a deep passion for these fascinating gadgets. With years of hands-on experience and a burning curiosity (pun intended), I’ve become an expert in all things related to lighters.
My journey with lighters began as a hobby and quickly became a full-blown obsession. I’ve explored the diverse world of lighters inside and out, from classic Zippo designs to modern plasma arc models. I’ve tested, tinkered with, and even collected rare pieces while learning the intricate mechanics and unique histories behind each one.
Through my writing, I aim to share my knowledge, insights, and reviews to help you make informed decisions about choosing the perfect lighter. Whether you’re a seasoned collector or just looking for a reliable fire source, I’ve got you covered. Join me in unraveling the fascinating realm of lighters right here at LightersInfo, where ignition meets expertise.
Alfred Davis